

You'll need:
- Images
- Mod Podge
- Paintbrush
- Scissors
- 1" Circle Paper Punch (optional)
- Magnet Sheet
- Magnet Buttons
- Pendant Frames
- Resin
- Mixing Cups
- Stir Stick
- Resin Dye
- Plastic Paint Palette
- E6000 Glue
1. Prepare your workspace.
Resin is
sticky...very, very sticky. The best way
to deal with resin spills is to avoid spilling on anything you care about, like
your dining room table. Put down a layer of newspaper to protect your work
surface. Your resin pieces will take about 24 hours to cure completely. Find a
flat, portable surface, like a tray or a book, that you can move to an out of
the way place to dry. I use a wooden tray that I cover in wax paper.
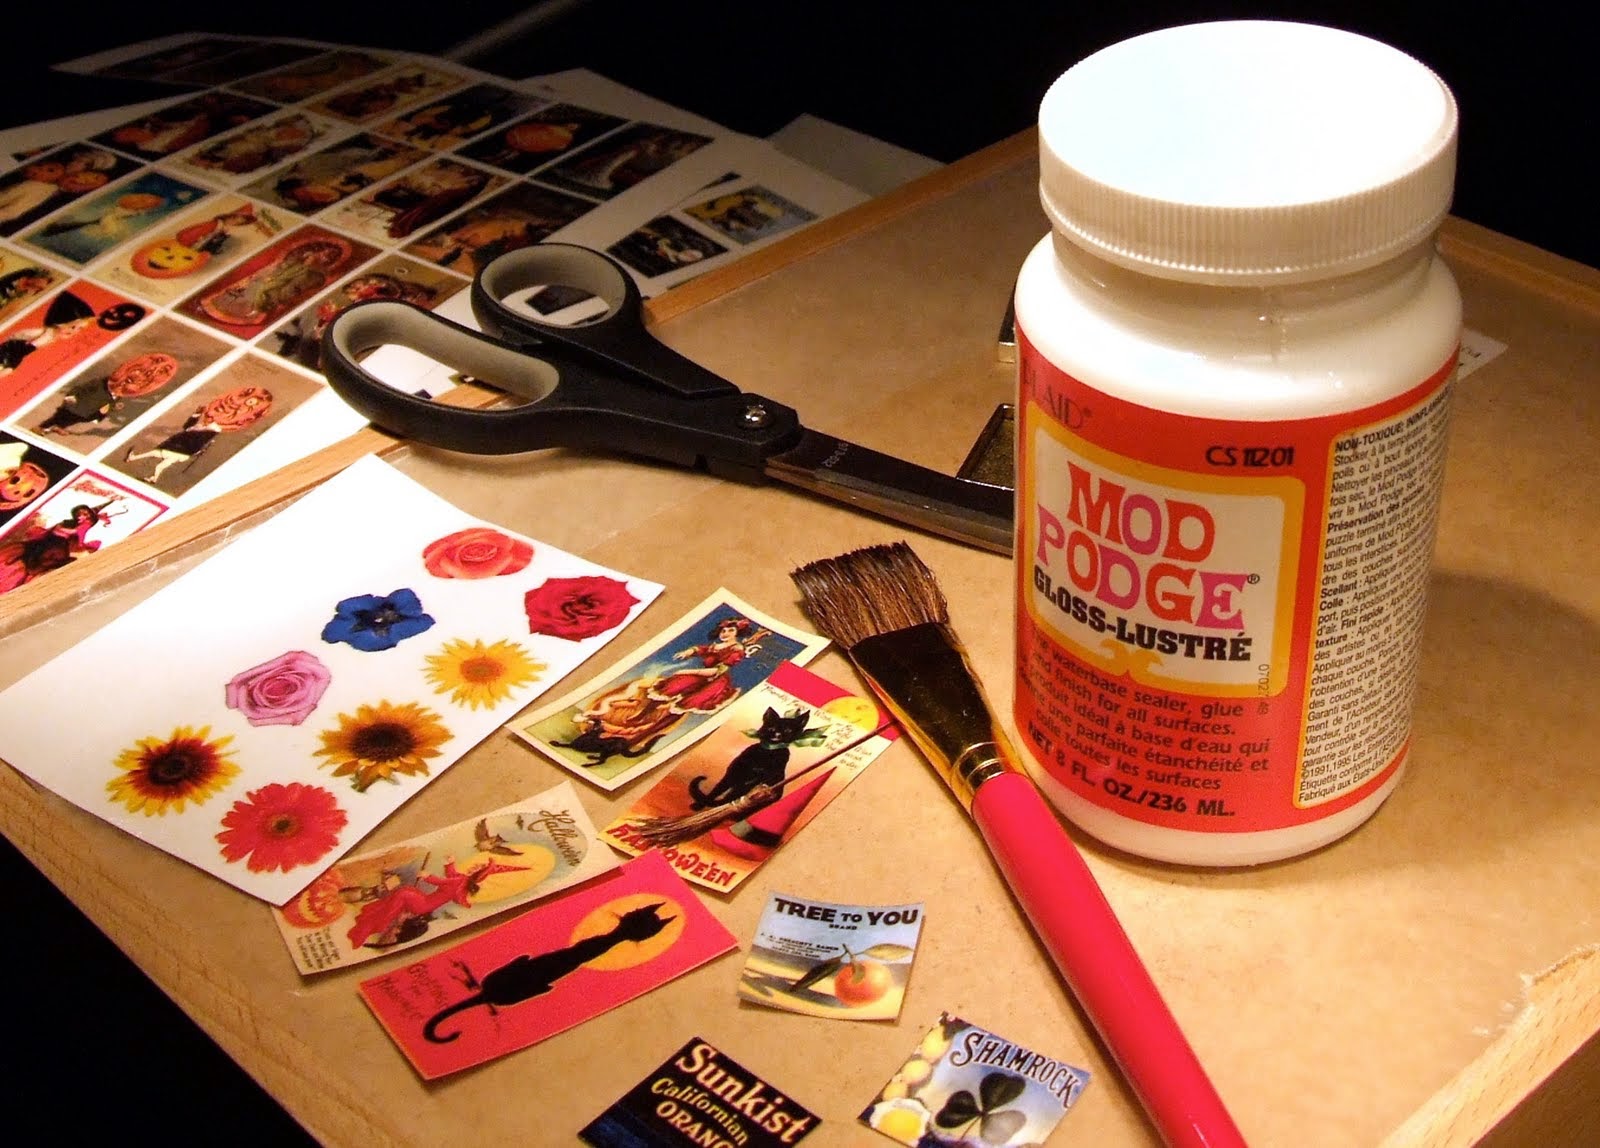
2. Prepare your images.
 There are
so many incredible images out there. The beauty of resin is you can use
anything, from magazine pictures to cards to photos, which allows you to create
items that are very personal. The images
I used are from etsy seller Petite Paperie, who has tons of incredible, high
quality image sheets. The best part about working with these sheets is you can
save them to use again and again. The sheets I chose were 1" x 1"
Square Fruit Crate Labels, 1" x 2" Halloween Postcards and .75"
square Bright Flowers. Check out her shop for more options.
There are
so many incredible images out there. The beauty of resin is you can use
anything, from magazine pictures to cards to photos, which allows you to create
items that are very personal. The images
I used are from etsy seller Petite Paperie, who has tons of incredible, high
quality image sheets. The best part about working with these sheets is you can
save them to use again and again. The sheets I chose were 1" x 1"
Square Fruit Crate Labels, 1" x 2" Halloween Postcards and .75"
square Bright Flowers. Check out her shop for more options.
Pick the
specific images you want to use and cut them to size. Use a paintbrush to coat the images in Mod
Podge. Be sure to coat all surfaces, front, back and sides, at least twice and
allow to dry completely. You want the image to be completely covered so no
resin will seep in and damage your image.
3. Prepare magnets & pendants.

Flat Magnets: Cut the magnet sheet to the size of the image. I keep a very small border of magnet around my image to make sure the resin completely covers the design and adheres to the magnet. Peel away the film to expose the adhesive and apply the image. Trim any excess magnet with scissors.
 Pendants: Trim the images to fit inside the pendant frames. Apply
a small amount of Mod Podge inside the pendant to glue your images in
place. Be sure the outside and corners of the image are firmly stuck to
the pendant. This will keep air bubbles from forming.
Pendants: Trim the images to fit inside the pendant frames. Apply
a small amount of Mod Podge inside the pendant to glue your images in
place. Be sure the outside and corners of the image are firmly stuck to
the pendant. This will keep air bubbles from forming.
Round Mangets: Trim the images to fit into the paint palette using scissors or a 1" circle cutter.
4. Prepare the resin.
 These directions are specifically for
Envirotex Lite Resin. If you are using a different resin, be sure to follow the
directions that come with the product.
These directions are specifically for
Envirotex Lite Resin. If you are using a different resin, be sure to follow the
directions that come with the product. Warm the
resin. This will prevent air bubbles from forming and make the resin easier to
mix. Put a bowl of water in the microwave and heat. Put resin and hardener
bottles in warm water for several minutes.
Warm the
resin. This will prevent air bubbles from forming and make the resin easier to
mix. Put a bowl of water in the microwave and heat. Put resin and hardener
bottles in warm water for several minutes.
Measure the
resin into 2 mixing cups. Envirotex Lite resin is a 1 to 1 mixture, meaning equal parts resin and
hardener are used. Be sure you measure each part carefully. If the resin
mixture is off, your pieces may not cure correctly or may be sticky.
Pour the resin into the hardener. Stir with your stir stick slowly to
prevent adding air bubbles to the mixture. When you begin to stir, the
mixture will become slightly cloudy. Stir for about 2 minutes, or until
the mixture becomes clear again.
5. Apply resin to the pieces.


Flat Magnets: Use your stir stick
to slowly drizzle the resin over the magnet sheets. If you apply enough
resin it should flow to the outside of the magnet without spilling over.
You may need to guide the resin into the corners with the stir stick.
If you spill the resin just slide the magnet over a few inches away from
the puddle and allow to dry.

Pendants: You can pour the
resin into the pendant frames, or drizzle with the stir stick. Fill the
resin to the top or allow to dome over slightly, whichever you prefer.
Some people like to fill to the top on the first pour and dome with a
second layer of resin once the first has dried. Since the pendant frames
are not that deep you can dome in the first pour if you choose to,
depending on the look you want.

Round Magnets: Pour the
resin into the paint palette openings and fill about half way. Let
resin sit for a few minutes so you can get rid of any bubbles that form.
Once the bubbles are gone, place images face down in the resin and coat
with a thin layer of resin. Be sure to leave enough room in the palette
opening (at least 1/8") to add your second layer of colored resin.
6. Get rid of bubbles.
Bubbles...they happen. Sometimes
they happen after a piece has set and you can't do anything about it.
Learn to like them. If not like, at least learn to appreciate them. That
said, there are a few ways to get rid of bubbles while the resin is
still soft.
- "Huff" on the piece, with
short bursts of air. Bubbles are popped by carbon dioxide. Your breathe
will bring the bubbles to the surface and pop them. You can also blow
gently through a straw.
- Pass some sort of flame over
the piece. You have to be very careful with this - do not get too close
or you can mar the surface of the resin or create ripples. It also
makes the resin smell horrible. But, it does the job, at least most of
the time.
- Use a needle or toothpick to get the bubbles to the surface, then either pop or remove them.
For more suggestions on getting rid of bubbles, check out Craft Zombie's blog.
You have about a 10-15 minute window for removing bubbles. After that
point the resin will start the set and you run the risk of ruining your
piece.
Bubbles are MUCH easier to remove when the resin is fresh. If you allow the resin to sit for awhile and then try to remove the bubbles it may be too late. Even after following all these suggestions, you may still get bubbles. And to that I say, that's the beauty of handmade! It's not a mistake, it's artistic. Chances are, you will be your worst critic. Most people won't even notice that bubble that you agonized over. So...do what you can but don't worry too much about it.
7. Add the second resin layer.

This step is only for the round magnets. Anytime after 12 hours the second layer of resin can be applied. Mix another batch of resin and add resin dye. You do not need a lot of dye...a little goes a long way! Start with a few drops and add more as needed. Mix thoroughly. Pour colored resin over the first layer and fill to the top of the paint palette opening. This layer should be level with or slightly below the surface of the palette rather than domed. Watch for 15-20 minutes to remove any bubbles that form.

8. Add finishing touches.
Pendants: Add necklace cord to pendants.


 Round Magnets: Once
the resin pieces are cured, remove them from the paint palette. Put the
tray into the freezer for 30-60 seconds to help release the pieces from
the mold. Use E6000 to glue magnet buttons to back of the resin design.
Allow to dry completely.
Round Magnets: Once
the resin pieces are cured, remove them from the paint palette. Put the
tray into the freezer for 30-60 seconds to help release the pieces from
the mold. Use E6000 to glue magnet buttons to back of the resin design.
Allow to dry completely.
Tutorial was taken from here.
No comments:
Post a Comment